IDEXX Reference Laboratories
DISCOVER MORE
IDEXX Digital Cytology
Personalized guidance from veterinary clinical pathologists.
Make your best decisions, faster, with 24/7/365 access to IDEXX’s world-class global network of veterinary clinical pathologists, with results in 2 hours.
- Scan and transmit high-resolution whole-slide images directly to IDEXX Reference Laboratories.
- Get personalized guidance for routine cases as well as critical and complex pathology cases.
- Discuss your case with an IDEXX pathologist 24/7/365.
- Review cytology results with images, provided exclusively with VetConnect PLUS, alongside other diagnostic results for a comprehensive view of your patient.
Visit our directory of pathology specialists
Simple, seamless diagnostic experience for rapid case management—right from your practice.

1. Order test.
Order test via VetConnect PLUS or your supported practice management system, and scan requisition ID to create a case.
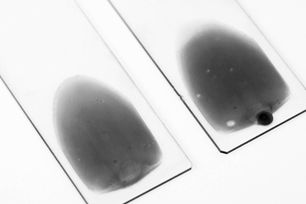
2. Select slides.
Select up to two stained slides for scanning.
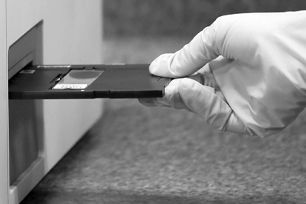
3. Scan slides.
Place stained slide into tray, and insert tray into the IDEXX Digital Cytology instrument. Repeat to scan second slide.

4. Submit.
Preview images and click Submit to send to pathologist.
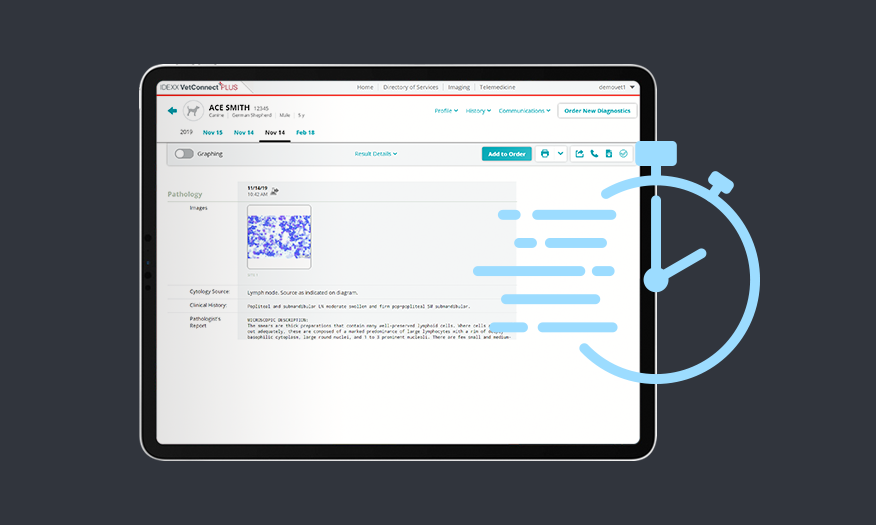
Integrated, comprehensive reports with images in 2 hours or less.
Exclusively with VetConnect PLUS.
- Simplify case management with results integrated directly into your practice management system.
- View and share comprehensive reports complete with high-resolution images, interpretation, and notes, exclusively on VetConnect PLUS.
- Access chemistry, hematology, and all other IDEXX diagnostic test results alongside your pathology results for a comprehensive view of your patient.
Compatible with majority of cytology specimen types
Impression smears from solid tissues
- Lymph nodes
- Skin/subcutaneous masses
- Internal organs: spleen, liver, prostate, intestine, lung, kidney, bone, pancreas, mediastinum, other
- Vaginal smears
Fine needle aspirations and body fluids
- Body cavity effusions: abdominal fluid, pericardial fluid, pleural fluid
- Joint fluid
- Blood films
- Urine sediment (dry mount)
- Tracheal/bronchoalveolar (BAL) wash
IDEXX Digital Cytology resources
Slide preparation
Always remember to:
- Label each slide with the patient name, date, source, and preparation technique.
- Save the specimen and keep a digital copy of all stained/submitted slides for 2 weeks.
- Keep 1–2 unstained slides to use if the pathologist recommends additional testing.
Read more about how to prepare slides
Fine needle aspiration and nonaspiration
- Use for skin/subcutaneous masses, lymph nodes, and internal organs.
- Select the technique best suited for the tissue to avoid cell lysis or excessive blood.
- Use 22-gauge needles, which work well for most tissue types.
Blood films
- Use fresh, well-mixed anticoagulated blood to avoid specimen deterioration.
- Maintain an approximate 30° angle between the spreader and specimen slide throughout.
- Spread the specimen in one smooth, steady motion.
Line smears
- Use for body cavity effusions, bronchoalveolar lavage (BAL)/tracheal lavage, and joint fluid.
- Include a direct smear; use an additional line smear for specimens with low cellularity or suspected infectious agents. If needed, use a squash prep for flocculent material.
- Submit a buffy coat and a direct film for specimens with large blood content.
Urine sediment
- Use 5 mL of fresh, well-mixed, centrifuged urine (set centrifuge to urine/400 x g).
- Maintain an approximate 30°–40° angle between the spreader and specimen slide.
- Spread the specimen halfway down the slide; stop abruptly to create a line.
Always remember to:
- Follow the recommended stain times.
- Check slides to see if additional staining is required.
- Replace stains as needed to prevent stain precipitate.
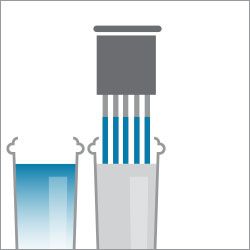
Step 1. Dip in fixative
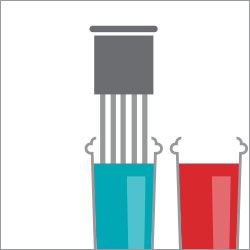
Step 2. Dip in red stain
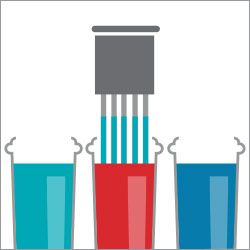
Step 3. Dip in blue stain
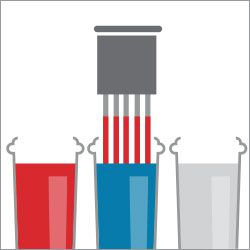
Step 4. Dip in water
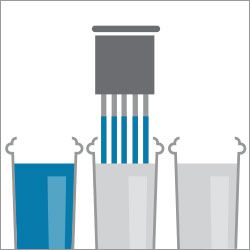
Step 5. Dip in water
For in-depth instruction and CE credit at the IDEXX Learning Center:
Preparing slides reference guide
Slide submission
To obtain a clinically relevant interpretation of the lesion, scan only slides that are representative of the lesion and are of good quality and cellularity.
To select your best slides:
- Check for even staining and visible material “blue to purple.”
- Inspect for intact cells by microscope or by reviewing the scanned image.
- Secure a stained slide into the slide tray.
- Gently insert the tray into the instrument.
- Scan, review the images, and select 1–2 slides that are in focus and adequately represent the specimen.
An IDEXX pathologist will ask you to resubmit a slide when the slides initially submitted cannot be interpreted.
This can happen for many reasons, for example:
- A slide was scanned stain-side down.
- A slide was not secured properly in the slide tray.
- The pathologist needs a different perspective.
- A slide has insufficient intact cellular material.
Note: The process for resubmitting a slide is different from the initial submission.
- Use the add-on code in your pathology report.
- Add the order to the requisition for the patient.
- Scan, review, and submit 1–2 new images.
How to resubmit a digital cytology slide to IDEXX Reference Laboratories
Results interpretation
Within 2 hours, pathology results are integrated directly into your practice management system and in VetConnect PLUS. Just pick up the phone or email the pathologist dedicated to your case from start to finish if you have any questions.
Use VetConnect PLUS to simplify case management even more:
- View and share reports and high-resolution images.
- Review interpretation and comments.
- Access all IDEXX diagnostic results, alongside pathology, for a comprehensive patient view.
FAQs
Whole-slide imaging takes advantage of recent advances in digital technology, such as computer processing, software, data transfer speeds, and cloud storage, to enable pathologists to examine specimens as if they were looking through your microscope. Unlike microscope cameras that acquire images of a portion of a slide, whole-slide imaging captures high-resolution images of the entire slide. This reduces the risk of missing a critical area of interest by enabling the entire diagnostic yield to be assessed by the pathologist.
IDEXX employs over 270 full-time pathologists to support global pathology testing. Our pathologists come from world-class veterinary universities from around the world.
The instrument does leverage artificial intelligence to recognize the slide and provide a recommendation for the area of interest for image scanning. It does not interpret the cells on the slide. The digital image is sent to an IDEXX pathologist, who then assesses and provides interpretation via a report with images.
You will receive your results within 2 hours of order status showing “At the lab” on VetConnect PLUS. The results will be integrated into the patient record and can be accessed via your practice management system or through VetConnect PLUS.
No, to provide all customers with results in 2 hours or less, we cannot direct cases to specific pathologists. Doing so would delay the receipt of reports with results and interpretations. What you can do is discuss your case with the pathologist dedicated to working with you from start to finish. You can access that pathologist directly via phone and email.
The following specimen types can be submitted:
Fine needle aspiration (FNA) or impression smears from solid tissue:
- Lymph nodes
- Skin/subcutaneous masses
- Internal organs (e.g., spleen, liver, prostate, intestine, lung, kidney, bone, pancreas, mediastinum)
Fluids:
- Body cavity effusions:
- Abdominal fluid
- Pericardial fluid
- Pleural fluid
- Joint fluid
Blood films
Urine sediment (dry mount)
Tracheal/bronchoalveolar (BAL) wash
Vaginal smears
Note: Cytologic evaluation of tracheal/bronchoalveolar (BAL) wash may be ordered as a cytology only (without fluid analysis).
Specimen types NOT suitable:
- Cerebrospinal fluid (CSF)
- Bone marrow
- Any specimens with suspect bacterial/infectious agent
- Wet mount urine sediment
- Acetate tape impressions
- Fecal smears
In the event a digital image cannot be interpreted by an IDEXX pathologist, customers will have the option to submit their slides to IDEXX via traditional methods by sending their slides to IDEXX Reference Laboratories.
Use the power switch on the back of the instrument to turn the power off and then on. Make sure that the instrument has been powered on for 20 seconds before restarting the IDEXX Digital Cytology computer. Turn on the computer using the power button in the lower-right corner of the monitor. IDEXX recommends shutting down and restarting the IDEXX Digital Cytology instrument and its computer at least once per week.
If you notice changes in image quality or see visible debris or particles when using the software to preview images, the instrument camera lens or specimen area may need to be cleaned. Simply call customer support at 1-800-248-2483 and a specialist will walk you through the process.
Visit the IDEXX Learning Center for a host of complimentary educational resources. You can take a CE-accredited course or watch short video clips from the course focused on specific topics. Whatever approach you choose, we’ll help you learn:
- How to prepare pathology slides for specific specimen types.
- Different slide preparation techniques and when to use them.
- How to submit slides.
- How to use the IDEXX Digital Cytology instrument.
Training
Pathology Slide Preparation Course
Preparing Pathology Slides: Fine Needle Aspiration and Fine Needle Non-aspiration Techniques
Preparing Pathology Slides: Surgically Excised Impression Smears, Tissue Scrapes, and Swabs
Preparing Pathology Slides: Blood Film
Preparing Pathology Slides: Fluids
Preparing Pathology Slides: Urine Sediment
Find more courses on all aspects of cytology and IDEXX services at the IDEXX Learning Center.
Support
Contact us
Need more help? Please call us.
For answers about the instrument or workflow, call 1-800-248-2483.
For answers about your pathology report, call 1-800-667-3411.
Guides
Pathology submission guidelines
Getting started with IDEXX Digital Cytology
IDEXX Digital Cytology Instrument Operator’s Guide
Getting started with IDEXX Digital Cytology (software version 1.0.3.39 or later)
IDEXX Digital Cytology Instrument Operator’s Guide (software version 1.0.3.39 or later)
Find out if IDEXX Digital Cytology is right for your practice.
Fill out the form below and an IDEXX representative will reach out to you.
Learn more about a specific product or service.
A representative will help you every step of the way.
IDEXX Reference Laboratories
DISCOVER MORE